Translate

Tuesday, July 10, 2012

A neighbor gave us a heifer today....I think

I was at work doing the morning shift of 5am-2pm.  At first break, I called Arlis and he started getting worried b/c Fargo was really acting up.  Next thing I know he sees a black/white heifer in the neighbor's field.  (The one you see down there)
 This field doesn't have cattle, or at least hadn't in the past, so he was concerned about it.  And then I hear unpolite words from my husband's mouth, as he watches said heifer break through our fence and start grazing in the garden.  We hang up and I call back later.
She broke through here
Then she made her way over to the garden.  Arlis got her into cattle alley...where she broke out again.  He finally got her back into cattle alley, and into the upper field, and into the barn.  I have no idea how.  I was at work, and he's much better with cows than I am.

After my tour of the repaired damage, I went to see yon heifer.  On my way over to see her, I found Boy's latest toy.  It's a mole...good Boy!
And I notice the ducks could really care less about it all.
And then I see the big girl.  She's actually very sweet.
After a day in the barn to calm her down a bit, we shut the gate to the drive, and decided to let her loose in the upper field.  The other cows were already brought up there.
And Fargo was having a chat with Horns over who's boss around here.  Horns has to be kept separated until all girls are known to be bred, or he goes to beef-whichever comes first.
We let her go, where she immediately found what she wanted.
And so did Fargo.  That's his...come hither moo.
Why hello there!
Is that...Ode de heifer?
What?
Well, you can guess what happens next...
Oh look a mimosa tree to be!
That has a flower beyond cool with neon colors.
All the other girls are getting along.
Can I go back in the barn?  Nope-we have to keep her for 90 days.  After that, if no one claims her, we're selling her.  I named her Baldy.


UPDATE!!  A neighbor that was out of town when the cops asked around came by a few days later and claimed her.  He described everything perfectly, and even gave us some hay for keeping her safe.  She's back home now, at least until she breaks out again :)

Thursday, July 5, 2012

The saving of calves

A quick and easy way to get started in cattle is to buy a bunch of bottle calves.  (many) Dairy farms strip the bulls from their mothers the second they see it's a boy without even letting it nurse once.  They sell it for next to nothing (we got ours for $40 each) and milk the mother.  This means you get colostrum in the milk you buy at the store, but the calf that will die without it does not.  The bulls wind up getting scours every time where they are shot up with antibiotics, anti-diarrhetics, and about half survive.  Why they don't leave them with their mothers and sell them later for meat for over 10X the price is beyond my understanding.  Especially considering how little milk they consume.  That's another topic.

We did buy a few of these.  I refuse to buy them now b/c we don't have to anymore.  We are established.  I won't even let Marcus get another one b/c I refuse to support such a horrible industry if possible.  But b/c we did, we now have experience in nursing calves back to health.

We recently had a problem with one.  Little Paprika, our first heifer to actually be born here, wouldn't get up. Pepper, her mother, had her in the woods and she wasn't nursing.  We carried her to the barn and kept her and Pepper separate from the others.  We started antibiotics once a day injections for five days, per the vet's advice, and tried to tube feed her.

Tube feeding a calf is hard.  One reason is you know it hurts, but you don't have a choice if you're going to save them.  But Paprika is a Dexter calf.  They're little, I mean LITTLE.  She's about the size of a goat now.  A regular Holstein calf is quite a bit bigger, but it's still hard to get that tube down their throat.  They don't sell smaller sizes, and that tube is NOT going down!  (If you do decide to tube feed, be sure to do great research, and lube the end with cooking oil.  If they're strong enough to fight you off to where you can't do it, they don't need it.)  So we pray her life into God's hands and try to get as much in her as possible.  She will not take a bottle or teet, and can barely stand with support, let alone without.

I was racing late for work b/c I spent time trying to do the afore mentioned, but was able to learn during break that Arlis found her standing in the watering bucket with a full belly.  That night we tried again, but she fought back more-YES!  Then the unthinkable happened.  She mooed for Pepper, and Pepper mooed for her, and she nursed.  We all stood there still and silent for fear of scaring her away or making her stop.  When she went and laid back down, we gave the fake milk to one of the lambs and went to bed hopeful.

(You can see how bad she looks)

The next morning, we gave her her second shot of antibiotics.  We brought a bottle.  One look at it, and she bawled for momma.  Here came Pepper, and she nursed.

Day three brought more hope as we gave her a shot, and by evening, she was up running around and nursing on her own.   Keep in mind, drought hits here around August for about two weeks.  We planned for it with long hoses and a sprinkler to water our half acre garden that feeds us for the next year in staple crops, and for temporary joys as well.  We do NOT plan for the drought to hit NOW and last for four weeks, and do NOT plan for 100 degree weather when we have snow storms that keep us home for a week or more at a time, especially in JUNE.  But Paprika is holding on.

Day four, we give her a shot, and work outside a bit.  We pour water on her, and a bit later, put a box fan that blows over, but not on her.  Even Pepper likes this, and returns to the barn enjoying the "wind".

Several days later, Paprika has put on weight, nurses normally, and has energy.  (I love this age b/c they run around with their tails straight up in the air-too cute).  At near one month old, we put her back into the lower field with all the others.  Fargo was thrilled to death and immediately began sweet talking Pepper.  The calves played together with fair fun, no bullying.

Whew!  One more calf nursed back to health.

Friday, June 8, 2012

Water bath canning, with times

I have the absolute awfullest times trying to find water bath canning times for canning things.  Every time I try to find a time chart, all I get is some fight about how it's going to kill me.  I will say this.  I have gotten food poisoning from Ruby Tuesdays.  It almost killed me, and several thousand dollars later, the local hospital tried to finish the job.  I finally got better with a $45 visit to a walk in clinic the next town over.  I have never once gotten even an upset tummy from anything I have grown here.  Raw eggs never refrigerated, raw milk, water bath canned, home fermented items, veggies stored in a "root cellar" for over 6 months, everything included.

I will also say that this site from the university of Florida states that botulism TOXIN is indeed destroyed at 176F for 10 minutes.  Therefore, logic dictates to boil your food for 10 minutes to prevent botulism poisoning.  This site, and most others on the topic, command (and I mean command) you to boil all home canned products, even pressure canned, for 10 minutes before using.  In fact, my aunt said she was always taught to do the same with store bought, and given the high incidence of poisoning from the stores nowadays, that sounds good to me.

Now, this site is from the CDC, and indicates that "Heating to an internal temperature of 85°C [185F] for at least 5 minutes will decontaminate affected food or drink."

(Botulism can apparently occur even with pressure cookers.  You have to boil your food after using a pressure cooker anyway.  Boiling destroys the toxin.  The spores are harmless....logic dictates....)

  So, I found a water bath time table in a cookbook from 1940.  This book has been a literal God-send and I wish I could get a newer copy as this one is falling apart.  It was my grandmother's.  It says the following: 
(For all those like me who have searched in vain, I'm posting it for you.)

1-Obviously, if it looks or smells funny, throw it out without tasting.
2-Boil all canned items for (this book says 5, newer sources say 10, and now they're trying to raise it to 20) minutes before consuming.
3-No mold, food should be firm, lid should not be bulging (bulging lids indicated gas formation which is a sign of spoilage).  Throw it out immediately without tasting if any of this occurs.

I am only including rare hot water times.  If you want a specific time for something, please ask and I will post it if I have it.

No acid added, water bath method, time in minutes, increase 10% for every 500 feet of elevation:

Asparagus, beans (string and lima), squash, vegetable combinations, peas, and greens, corn-180
Beets, carrots, cauliflower, okra-120
pumpkin-240
meat-300


Now how to do it.

This is how I did beets

Pick a beet...that's a big beet

 Boil all your jars, lids, and rings for 15 minutes
 Cut the greens off your beets and boil them for a good 30-40 minutes, depending on their size.

After they get soft, the peels just slip right off.  Then you can cut them into bites and fill the jars.  Leave a good inch and pour boiled/boiling water over them to the inch mark.  I use the water I boiled the jars in.  Now, seal them up and SLIGHTLY turn the rings back to allow escape of air if needed during the canning process so your jars don't explode.  I have found the kit with the jar lifter thingies and magnetic wand and such is wonderfully practical.  Be SURE the water covers the jars completely and boil the appropriate time with the lid on.  Due to our elevation, we had to for three hours.  Add water if needed.  Pull out and let cool on own.  Completely loosen rings to keep from rusting shut and label the jars with the date they were canned.  If any of the lids didn't pop down, they did not process correctly and should not be stored in that condition.

Tuesday, May 29, 2012

Storm Shelter

Growing up where we did, and now living where we do and in what we live in, we bought a storm shelter.
Arlis dug a hole, by hand, until it was quite deep.  But then he hit rock and we had to call in the big guns.

 The jackhammer of the backhoe scared the chickens, and made one guinea fly off (he came back).
 And many hours later...He finally dug through the last of the feet needed...
 And the shelter was brought in...hmmm...it looks awfully small...


 Overtarred so as to prevent moisture leakage.
 Just outside our front door.
 Cover it up a bit
 It looks good, but it's still not done.  We have dirt to mound on top and sides that's coming the next day.
 Inside.
 I'll just blow away, thank you because you are NOT getting me in there!


We were hoping to double it as a root cellar, but it really is too hot.  The top and door have to be left uncovered so we have a vent on top, and can get in.  This allows the sun to heat it up too much.  I hope it's not too hot when we have to use it!

Now, the really cool thing is this.  We advertise with cookouts.  So, we offered Dexter burgers to the crew.  The crew have friends/relatives that raise Angus.  They said our meat (with NOTHING added) was the best they ever had.  Now, Angus used to be that way, hence it's popularity in the day (now it's just a fad name).  But then the commercial breeders got involved and went stupid, and now they're all grain fed just like all the other meat on the market.  (Even a Holstein is the best meat you've ever had if pasture fed-and that's from buyers and their cookout guests' mouths!!)  Soooo....they're calling up their Angus friends to tell them to switch.  We gave them a long speech about grain/pasture and that if you grain feed Dexter, it'll kill the point of it all and will be awful.  They said they would pass it along.  One guy runs 80 cows of his own.  He wants one of our bulls for first time heifers.  Cool.  But the really cool part was that the fill dirt was free.  Now, I'm not saying it was the Dexter beef for sure, but Southern hospitality did seem to help us out for about....$350 that day.


Here's the owner smoothing out the top...it was my day off
 It looks real nice now.  And hopefully, we won't really need it. We've sprinkled grass seed, and we'll sprinkle some clover seed as soon as I get more from the store.  Then it'll look real nice.  I'm also thinking of pretty little flowers around it...hmmm.

Thursday, May 24, 2012

How to Dry Herbs

It's time for a new "how to" blog.  Well, my oregano is waaaaay overgrown, so I decided to go ahead and dry some herbs for the winter.

See the green bush on the bottom right...no, over a bit more, no left, up....oh never mind.   That's oregano.  (this has been a difficult year)
 Mint
 Oregano
 And the little tiny pine tree is rosemary.  Now, rosemary lasts forever, and I even had fresh rosemary last winter, so I'm leaving it along for now at least.
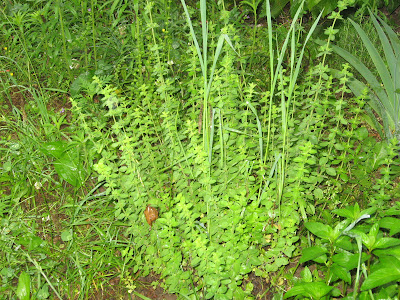
 Cut young fronds.  Some of mine were going to seed.  Do NOT eat those.  You can tell when they are too old as they will be taller, bigger, and the leaves more spread out.  They stand out from the other fronds.  (oregano)
 Rinse them off real well.  Do this NOW as it's impossible once it's dried.  Line the cut ends up together.

 Lay whatever type of string you will use underneath.  Do not put too many together.  Just a small bunch so they can dry completely.
 Tye a square knot.  You want it tight, but don't break the stems.  Be sure to leave leaves on top of the knot to catch the string so the herbs don't slip and fall.
 Hang in an everyday room.  The basement is too cold and damp.  You want a place you will be normally.
That's it!  Now, bear in mind, USING dried herbs of this fashion is different than you're used to if you use "canned" or even fresh herbs.  Take a leaf or too CAREFULLY off so as not to lose other leaves, and crush in your hand over the food.  The crushing releases oils that will make it taste like you're using fresh.  If you chop the herbs or crush them before hand, you'll lose all flavor and you might as well go buy them from the store.  (I've bought plenty, as you can plainly see, so I'm not bashing that)  If you've only ever used store bought, test this in a well known recipe, and go gently, as you are probably not used to the flavor.  ENJOY!!

Wednesday, May 9, 2012

Ant Problem

A lot have had ant troubles.  Not me.  We just had one ant.

 OK, OK, we've had sugar ants, but it's that time of year.  Terro just lives on the counters and shelves this season.  FYI, that is one of those collection tubes for blood collection of pregnancy checking on cattle.  (Don't ask what's in the fridge)
 And here's a quarter to show you the size...and a lady bug...that's dead...I guess I need to clean.
I put the tube on top of it and drug it off the shelf onto our electrical bug swatter.  It's a tennis racket with metal instead of strings, batteries, and a nasty shock to insects....hee hee hee.